First of all:
Requirements:
The last 3 are optional and the more experienced will consider them dramatisation.
Personally, it took me about 5 hours and a lot of googling and swearing.
An experienced person could do it in 10 minutes. Someone following what I
hope are decent instructions, maybe an hour depending how careful they’re
being / how much they’re worrying about how hard they’re pulling on things.
In all honestly, in hindsight I’d just pay someone else to do it! It was very stressful.
If you’re not confident yanking trim etc, I’d say do that.
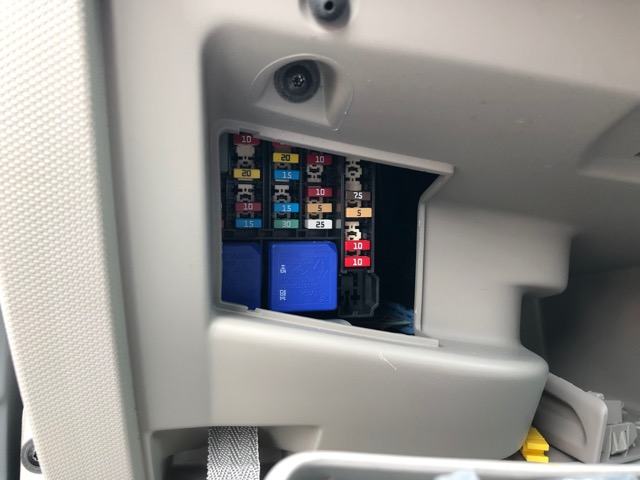
First, open the glove box and remove the fuse box cover therein. Behind it, you’ll see
the mini fuses. We want F29 from the fuse reference linked above as that’s a nice safe
one to pull (just the accessory socket) and use as a piggy back…. now, Renault in their
infinite wisdom made the access hole too small to actually reach half the fuses,
including no. 29. Slow clap to Renault for managing to design a fuse access hole that
is too small to, you know, access fuses, and obscures the one that is probably most
commonly blown as it involves users plugging in all their dodgy accessories.
You have to pull the car half to bits instead.. you couldn’t make it up. But we’ll
need to pull things apart a bit to get the wire sorted anyway, so let’s go.
Here you can see the fuses and the first of the Torx screws to remove:
Here’s the second Torx on the right hand side of the glove box, remove this:
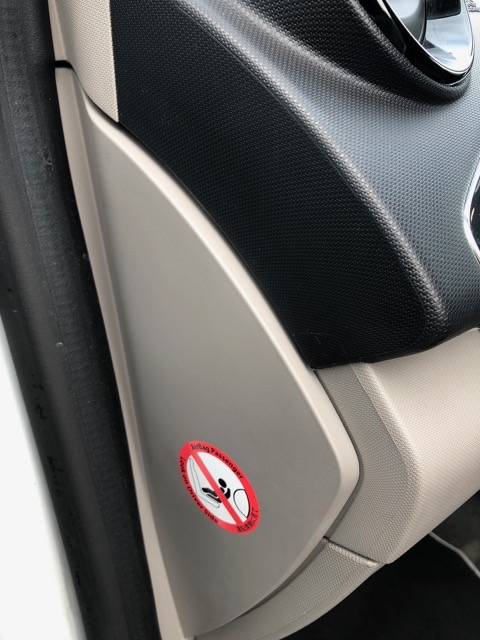
Now for the next photo below, see this ‘D’ shaped panel with the airbag sticker on it that is revealed when the door is open? (Don’t worry like I did, it doesn’t have the airbag behind it ready to blow up in your face or anything!). This panel pulls away and safely out from under the weather seal. I used an ice scraper of all things to lever it directly away (towards the door) starting at the pointy edge closest to me (when sat inside), or you could use a large flat bladed screwdriver, just be aware of the risk of leaving pry marks in the plastic it if you use a screwdriver.
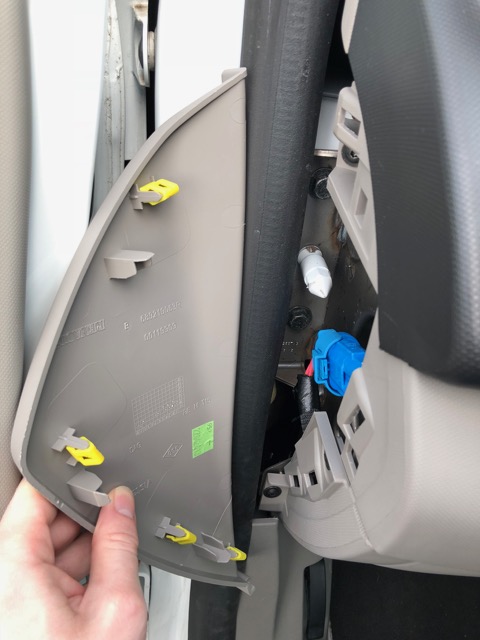
It takes a bit of force but nothing serious yet, basically you’re pulling out the 4 clips you can see on the removed panel:
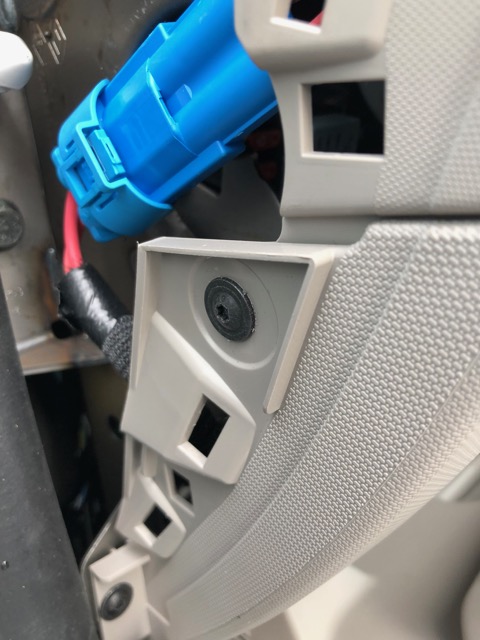
Now the panel is removed, you can see the two other Torx screws that need to be removed in order to remove the glove box (DON’T mess with that blue connector, it just happens to be in the photo, ignore it). The bottom Torx is out of focus but it’s in the bottom-left area of the photo below:
This is where the shorter Torx or right angle adapter may come into play as I found there wasn’t enough room to properly get my Torx driver in between the door and the upper screw.
Anyway once those two are undone, the glovebox can be removed. This is the hard part.
Elsewhere on the various Zoe forums it was described that “you might need to give the glove
box a little bit of a tug towards the passenger seat”. Well I learned that “a little bit of a tug”
was an extreme understatement that must have been written for comedic effect. It meant in my
case about an hour of yanking and swearing and saying “this just isn’t coming off, just how the hell?”.
It DOES come off (as long as you’ve removed all 4 screws) but you need to be BRUTAL with it.
BEWARE, I did break one of the yellow clips in the process, luckily it wasn’t really needed as it’s
held in well enough with the other clips and screws and I’ve not noticed any rattling afterwards.
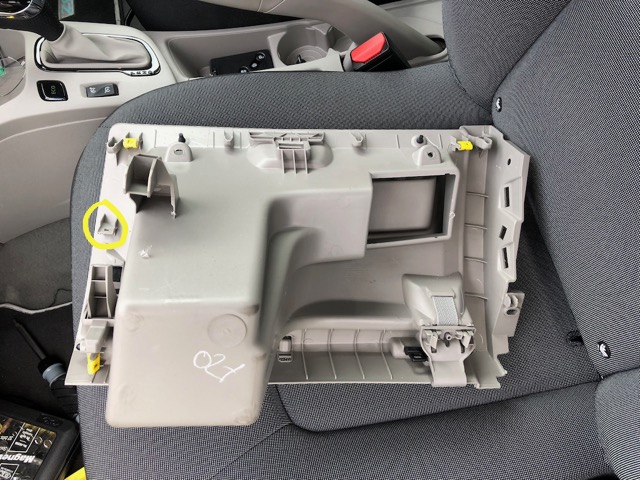
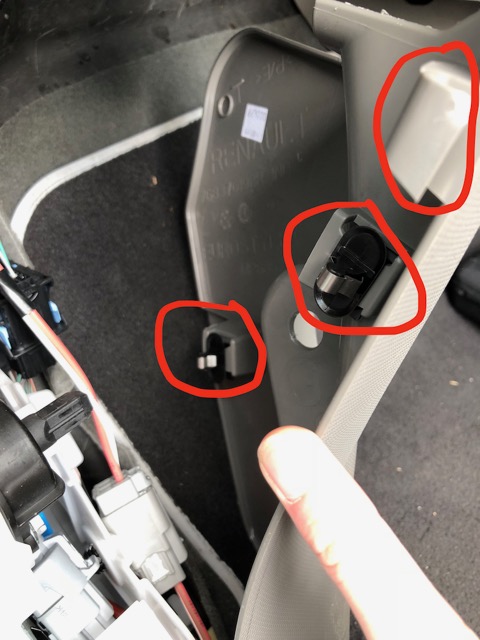
Basically, get all Herculean gorilla style on it. Try to be even with your yanking using whatever bits you can grip as there are 3 clips down the right hand side and one on the top left (when looking at the fitted box). Eventually you’ll be able to rip that glove box out in a show of brute force worthy of securing your place in mythology, and you never know, maybe even avoid breaking any clips. Here is a picture of the rear of the glove box so you know what you’re fighting against (the yellow bits). As one of the yellow clips broke on mine, I’ve circled the one that’s missing. Obviously, you’re looking at the back, so what’s on the left in the picture is on the right when fitted. You can see that infamous little joke of an actual glove compartment sticking out there for reference!
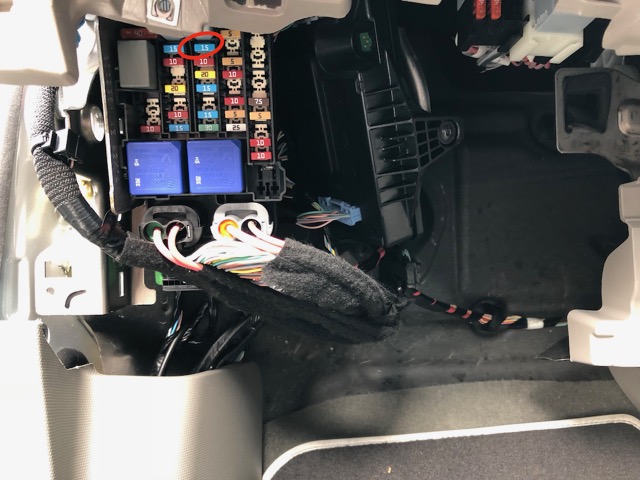
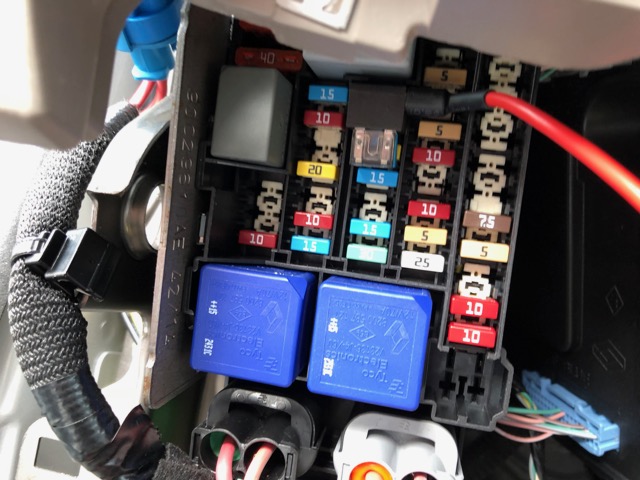
With the worst part of the entire Zoe aka the most useless and worst designed glove box in motoring history finally out of the way, you can actually get to F29, the blue 15A fuse I’ve circled in red below. Cross reference it with the linked fuse guide above, please, to double check. If you pull this (using the included removal tool or gently with pliers) that should kill the accessory socket so it won’t come on when you trigger the ignition (e.g. by closing and opening the door).
Next, remove the bonnet release lever. I forgot to take a picture, but you can’t miss it, it’s where the passenger’s left foot would be and will have been staring you in the face while you were yanking the glove box. It just pulls straight away off the spindle. It might need the assistance of a flat blade screwdriver to lever it off the spindle a bit.
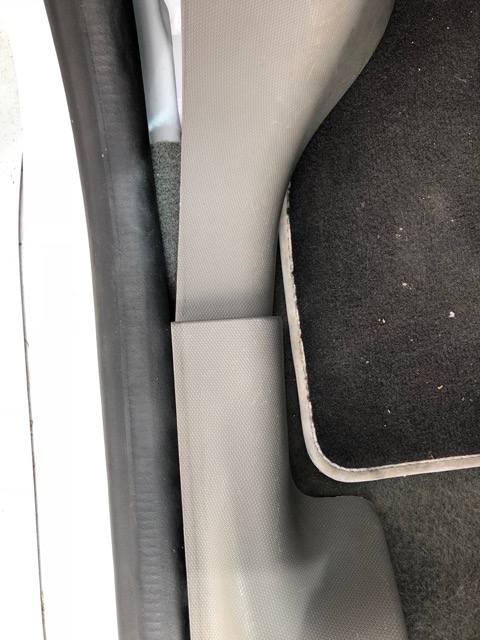
Now we’re going to remove the trim where the lever was but first, follow it towards the doorway and you’ll see this join where the next piece of trim sits on top of it (I’ve already pulled the trim away a bit in the photo but you get the idea):
Pull directly up on the edge of the joining piece to unclip it which gives a bit of wiggle room.
Now pull the trim piece directly away from the body (i.e. towards the centre console) starting at the back (where one clip is) then try to get your hand under and pull away the bit closest to you, where the other clip is. You do need to use quite a bit of brave force where you might feel afraid of breaking something (but not as severe as the glove box). You should also be careful with the trim where it meets the rubber seal, as there’s a plastic ‘hook’ that sits under the rubber.
Here is a picture of the trim pulled away, I’ve circled the two black clips that you are undoing and the plastic ‘hook’ you need to be aware of (I slightly bent the bright bit you can see at the top)
Personally, I couldn’t figure out how to unclip this piece of trim from underneath the adjoining piece that we unclipped. Maybe I just needed to use more force. But you should be able to pull the trim away enough now to get the negative wire from your hardwire kit down and attached to the bolt that holds the bonnet release mechanism in place.
With your 8mm spanner you can loosen the bolt on the bonnet release mechanism and then slide in the negative terminal on your hardwire kit (which it tells you to attach to a nearby bolt, and this one works) and tighten it up again.
I’ve circled the bolt in question below:
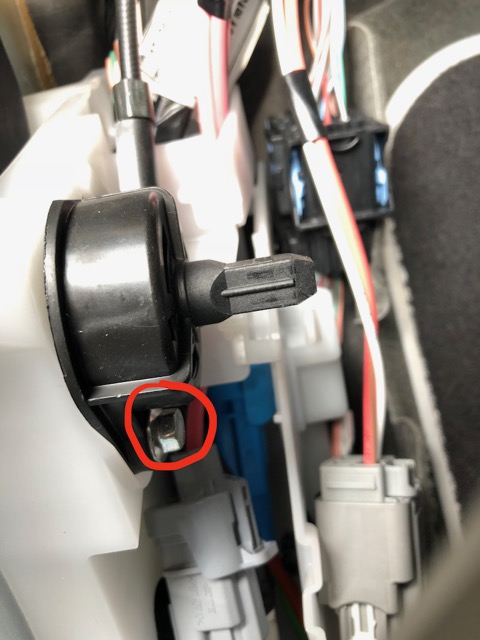
It works because the bolt goes through that plastic chunk and into the metal body.
I chose to use a tie-wrap to attach the 12V to 5V converter box to the felt-wrapped bundle of cables so that it doesn’t end up rattling around.
Now we attach the fuse tap. Follow the instructions that came with yours to find out which slot to insert their included fuse into and which one to slot the original 15A fuse into.
The one I bought (by DriveSmart) isn’t the greatest, you can see below that the wire sticks out and interferes with the plastic divider in the fuse box. I was able to bend the red cable enough to shove the wire tap in, but it made me uncomfortable to bend it so much at the reinforced sleeve. I’ve heard good things about the Nextbase ones, if your dashcam uses Mini USB, and it looks like it fits better – mine’s Micro USB though so I had to get this one instead. It also needs quite a firm shove as it can be a bit on the loose side.
See how severely I had to bend that bit of reinforcement because of the divider in the fuse box. Oh well, it works!
At this point you should be able to quickly plug in and test the dashcam and accessory socket (shut and open the door to activate ignition for 5 minutes or so) and hopefully, continue on.
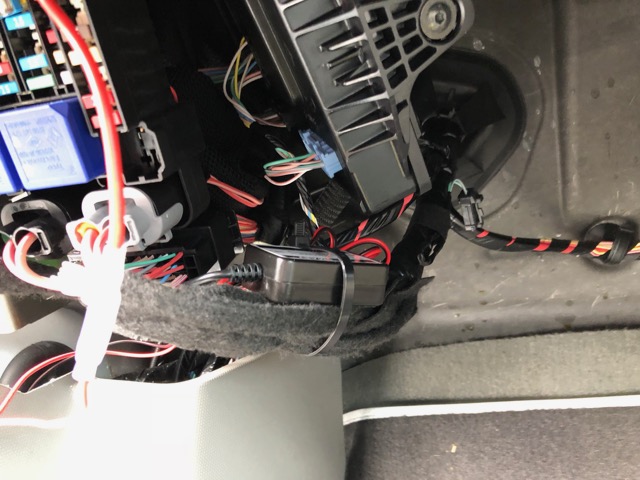
Here’s another shot of the wiring, you can see the negative cable disappear down behind the trim towards the bonnet lever, and the red cable I tie-wrapped into place just after taking this shot.
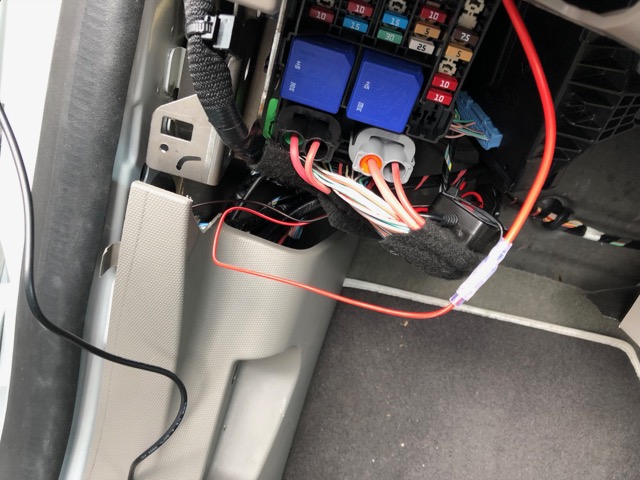
The USB output cable is then just kind of led up the side where that side panel is currently removed. Note some of the metal parts are quite sharp, so I took care to route the cable in such a way it wouldn’t end up rubbing on one of the sharp edges and potentially eventually cutting in. You can see the black wire on mine just kind of trailing up:
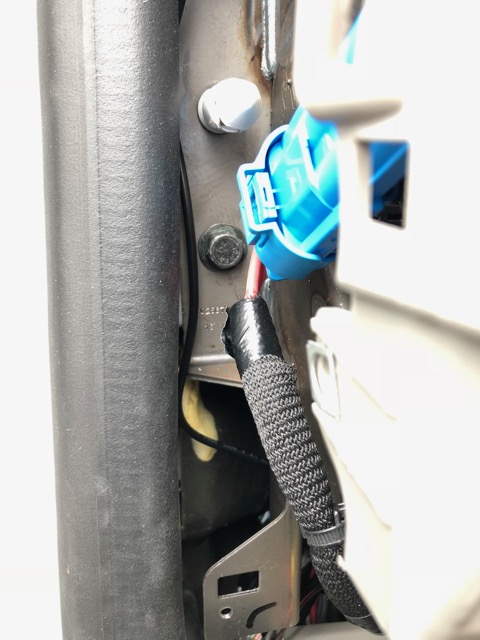
It’ll come out here, where you start tucking it in under the rubber seal as shown:
Under that rubber seal, you should see that there’s just enough of a gap to guide the cable in, possibly with a bit of assistance from a fingernail or thin plastic tool, and force it to tuck itself under the light plastic trim. Some may argue that you should just remove the trim and do it that way, personally I’d had enough of that at this point and found that tucking it in did the same job and that the rubber pushed back over snugly as it’s meant to. If the cable successfully squeezes through that gap and goes under the trim then you won’t get any bulges underneath the rubber.
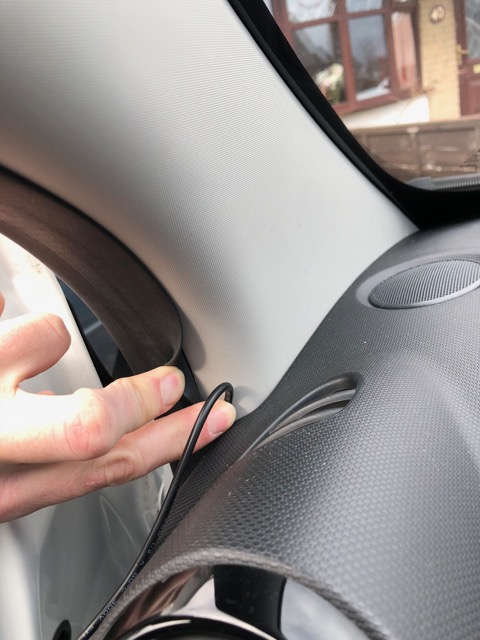
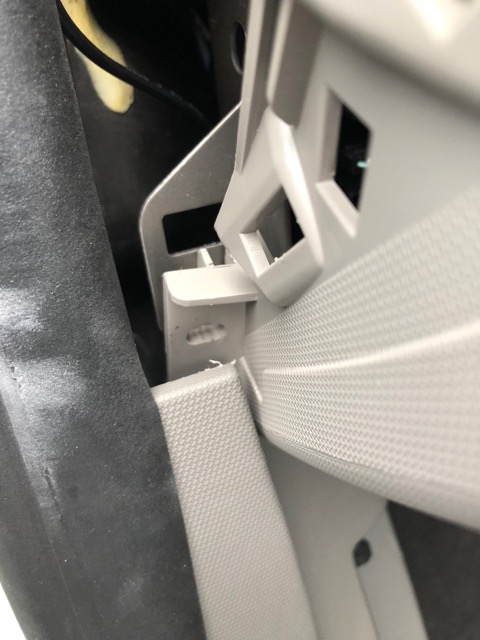
You’ll then reach the top of the A frame like so:
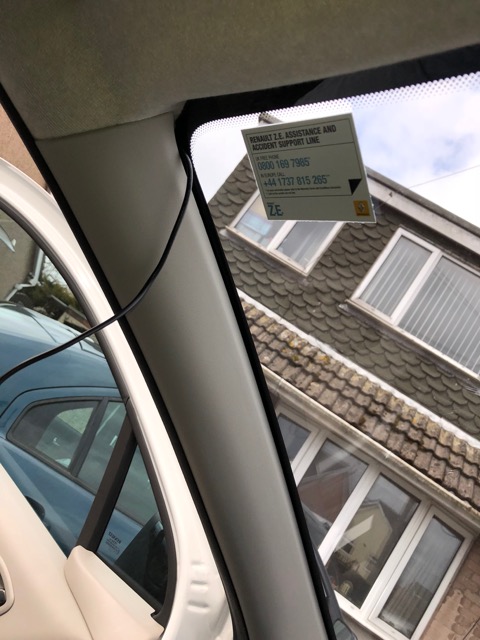
From there it should easily tuck under the roof lining. Personally I had a bit of a battle getting it to go under the corner – you could just have that tiny 2cm or so of cable exposed (you’ll never notice it) or I persevered with a plastic spudger and got it to go under.
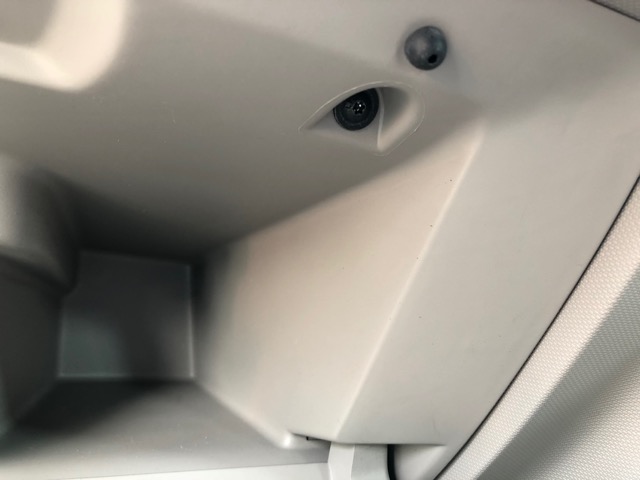
Now you can just tuck the cable in the roof lining across to the mirror, where you’d probably fit the dashcam! Mine’s a DDPai M6+ and I positioned it on the passenger side about 1cm to the left of and 1cm down from the black dot pattern on the windscreen by the mirror, so that the camera doesn’t get partially obscured by the box of tricks under the mirror. Your positioning may vary.
Getting things back for the most part is “whack it til the clips go in” in the reverse of removal.
Getting the glove box back can be a bit of a puzzle. Here’s where it meets the trim, see how it has to go underneath it:
When you manage to line the plastic lug up with that rectangular hole, then the clips should line up.. if so then you just whack it til they go back in and replace the screws.
Putting the side cover on is a simple “slide under rubber seal then press clips down”.
Go around any of the rubber seal and trim parts you pulled at, squeezing them back into place where necessary. Everything should go back as snug as it was, I’ve found the parts reasonably resilient to all the bending, pulling back and yanking.
Good luck!